Antipyretics for children are prescribed by a pediatrician. But there are emergency situations for fever when the child needs to be given medicine immediately. Then the parents take responsibility and use antipyretic drugs. What is allowed to give to infants? How can you bring down the temperature in older children? What medicines are the safest?
Description:
The mod adds the legendary cursed blade "Umbra Sword" to the game, as well as the story of its return. In order to start searching for swords, talk to Farengar in Whiterun and buy the book "Confessions of Umbra" from him, from which you will learn about the difficult fate of the last owner of the sword. But this, of course, is not the main thing, the book contains hints - where or from whom to look.
And there are two Umbra swords in fashion - a copy and an original, they differ both in appearance and in characteristics. You can buy a copy, but the original will either have to be stolen or its owner killed. I’ll note right away that obtaining the sword is directly related to one of the Shadow Brotherhood quests, or rather the Glory to Sithis quest.
Craft:
The Umbra Sword can be crafted and requires ebony ingots. Blood is also correctly displayed.
In version 1.5. a replayer of the two-handed version of the legendary sword was made, the number of charges for both types of swords was changed, the base damage was changed, 3 volumes of "Confessions of Umbra" were combined into one book, the design was slightly changed.
In version 1.5.1, a bug with enchanting the original sword has been fixed..
Installation:
Copy the contents of the archive to the Data folder. From the appropriate folders, select esp with one variation of the sword, connect it to SkyrimLauncher. You can connect only 1 version of the sword at the same time: either 1-handed (it remained in the kit), or 2-handed.
All rights to the mod belong to - Demolir
Do not forget to increase the reputation of the author of the mod
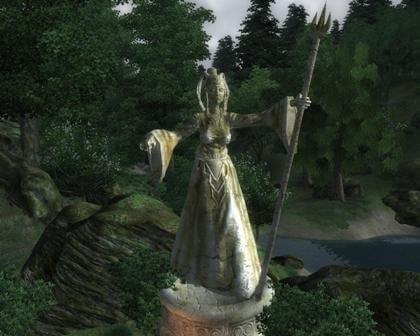
To complete this task, your character must be at least level 2. Azura's Shrine is far north of Cheydenhal, north of Lake Arrius, about the same latitude as Bruma, only far east of it.
To find out what kind of offering Azura needs, talk to her priest Mels Marion. He will tell you that this requires one portion of "glowing dust", and the offering itself must be made at dawn or dusk. "Glowing Dust" can be obtained from will-o'-the-wisps, which are quite common in the southern regions of the province, they are especially visible at night.
Sunrise and sunset are considered to be approximately between 5-7 pm and morning. After the offering, Azura will give the task to free her followers from the torment. Once upon a time, while cleaning the mine from vampires, they themselves became infected with vampirism, and in order not to inadvertently infect one of the random travelers, they decided to immure themselves in the mine and cannot find peace to this day.
You need to go and simply kill them, freeing them from torment. The "deserted mine" in which the vampires are walled up is located southwest of the sanctuary. Azura will open the entrance there specifically for you to complete your mission. There are five Vampires in the mine, three in the first half of the mine, and a couple more in the far part, which is hidden by a stone.
To remove it, you need to pull the cord hanging from the ceiling of the mine. After killing all five, head back to Azura's shrine. The goddess will thank you by handing over a very useful artifact "Azura's Star" (hello Morrowind!), which is actually an infinite soul stone, that is, it does not disappear after charging the item, but simply discharges.
Vaermina's Shrine is located southwest of Cheydinhall and east of the Imperial City, on the shores of Lake Poppad. Your character must be at least level 5 in order to receive the quest from Vermina. You can find out what offering Vermina requires for herself by talking to her priest Aymar Duar. He will tell you that in order for Vermina to give you the task, she needs to bring the Black Soul Stone. You can find this stone in the caves where necromancers live, or you can make them yourself in places where the altars of necromancers are located. After you give her the offering, she will give you the next task. You need to return to her the "Vermina Ball", which was stolen from her by several magicians, led by the magician Arcved. Now you have to go to the Arcved Tower and take the "Vermina Ball" from him. The tower is located south of Vaermina's shrine. In the tower itself you will find quite a lot of unusual things, but in principle the paradigm will be the same, to go forward destroying monsters in front of you. Although the path branches, but as a result, you will still come to the Death Halls of the Arcved Tower, where you will find the Arkved himself in an unconscious state and the "Ball of Verimina", which the goddess is looking for. Here a surprise awaits you, it turns out that it was possible to avoid long wanderings through the labyrinths of the tower, the hatch (disguised by bushes) through which you exit the tower is a few steps from the doors through which you got inside the tower. Now return to Vermina and give her the ball. In gratitude, Vermina will give you the Skull of Corruption staff. The spell that the staff casts on the attacker is that his double is called to help you for 30 seconds. At this point, the task is considered completed.

To receive a quest at the Shrine of Sheogorath, your character only needs to be level 2. The sanctuary itself is located between Llavin and Bravil, west of the Niben River, and also west of the road that leads along it, in fact, the sanctuary is located right on the border with the neighboring province of Elsweyr. Do not be surprised by the public that wanders around the sanctuary, because Sheogorath is the god of madness, respectively, and his audience is not quite normal. One of these comrades, who will be in a white coat, named Ferun Ravel, will tell you, albeit rather incoherently, about the offering that needs to be made to Sheogorath. The offering will consist of three components at once: yarn, a small soul stone (empty) and lettuce. All three ingredients are fairly easy to obtain. Yarn by rummaging through any unowned boxes, barrels or chests, and the other two can be bought in shops or taverns. After Sheogorath accepts your gift, he will set the task for you somewhat more vague than it might seem at first. You have to make the inhabitants of one village called "Border Post" (it really is located right on the border with Elsweyr) believe that the time for the fulfillment of their ancient prophecy has already come. Sheogorath will explain to you that the inhabitants of this village firmly believe that when certain prophecies come true, the end of the world will come. Accordingly, you are instructed to make them believe in the end of the world. Sheogorath justifies the need for this act by saying that the inhabitants of this village live too boringly and believe in prejudices too piously. First of all, he advises you to talk with their shaman Ree "Bassa, and after talking with him, you will continue to build a subsequent plan of action yourself. Go to this village, it is located south of the sanctuary, you just need to go along the border with Elsweyr to not to miss it. It is quite easy to find a shaman among them; he will have a black cape on him. Ree "Bassa will tell you about three prophecies that must come true in order for the end of the world to come, or rather, he will tell in detail only about two of them. First, this is the invasion of evil spirits (by evil spirit he means something like an invasion of rodents). The second prophecy is the sudden death of livestock for no reason (livestock is in his concept a few sheep that graze in a paddock nearby). But about the third, he will not tell you, he will only hint that it is associated with strong fear. After that, he strongly recommends that you stop at the "Border Post" tavern, and in the evening come and listen to their stories near the fire, near the tavern. In reality, they don’t give you a single normal hint, the more interesting the completion of this task. Go to the tavern and talk to her mistress S "Tasa. She will tell you that she can make excellent cheese, and at the same time so fragrant that she even has to put it in a box so that it does not stink a lot. Also, if you talk a little more about local affairs, then you will hear one small but important detail, the smell of food cooked on a fire is carried for many hundreds of meters around.Now comparing this information, the plan of action becomes obvious.Steal "olroy cheese" from a box near the bar (where only one piece lies) and throw it into a pot, which is heated on a fire. Soon you will see how a flock of rats come running into the village and the locals, of course, will take this phenomenon as a fulfilled first prophecy. Let's be consistent, so we will smoothly move on to the second prophecy Here, too, nothing clear is said, it is only clear that the sheep will have to throw back their hooves, while at first glance without any obvious reason. Accordingly, a simple felling of this cattle is not good atitis. I will draw your attention to the fact that after the invasion of rats, there will be several heaps of a strange substance, this is rat poison. You need to scrupulously collect this substance and, logically judging, drag it to the sheep in the barnyard. In the yard you will see their feeder, and pour poison there. After a while, the sheep will die, and after that you will be told to go to the center of the village. By "center" is meant the area between the first and second flights of the widest staircase in the village. In the "center" you will be sharply paralyzed, and then you will see what the third prophecy should be, the fulfillment of which Sheogorath himself took upon himself. The sky will gradually turn red, and then dead dogs will begin to fall from above, or rather, while they fall, they will still be alive, they will die when they hit the ground. Although crazy, but quite a beautiful sight. After that, you can return to Sheogorath for a reward. He will give you an incomprehensible thing called "Wabbajak". Its effect is that it turns your opponent (non-humanoid) into a random creature for 30 seconds.
His shrine is south of Chorrol and north of Skingrad, west of the island ruins of Elenglinn, and not far from the shrine is Fort Dirich. To complete the task, your character must be at least level 2. To find out what kind of offering Sanguine needs, talk to his priest Engorm. He will tell you that Sanguine should be presented with a bottle of Cyrodiil Brandy. Cyrodiil Brandy can be purchased from the Alchemy Shop. Return with a bottle to Sanguine, and he will give you a rather curious task. I will begin to explain the essence of the task from afar. Sanguine thinks that Countess Lyavina leads a too regular and boring lifestyle, which he does not really like, so he wants you to play a little prank on the Countess and her guests at the upcoming dinner party, namely cast on the Countess and all her guests spell "frozen reality". You don't need to look for this spell. Sanguine will give it to you himself. Go to Llavin's castle and in the throne room you will see a guard standing at the side door, if he is not there, then wait a bit, he should appear there after a while. You will need to talk to him, while in the process of communication he will need to be convinced to let you into the dining room to the guests, how you will be dressed can help a lot, the richer the clothes, the faster he will agree to let you in for a dinner party. By the way, it is better to persuade him from 6 pm to 12 am, otherwise he may refuse to talk to you at all. 4 guests and Countess Alessia Caro herself should gather in the hall, only then can you cast the spell. There may be a glitch here, the countess simply does not appear at the dinner party, then the problem will have to be solved using the console. In general, it is better to cast the spell from a far corner, in stealth mode, wearing a Gray Fox mask, because as soon as you cast the spell, you will automatically become guilty of attacking guests. Although there will actually be no attack, just after casting the spell from all guests will lose clothes (including yours). As soon as all the guests, and the Countess, are undressed, you can immediately go back to the sanctuary of Sanguine for a well-deserved reward. In gratitude for organizing the drawing, Sanguine will grant you the staff "Rose of Sanguine", which summons a Daedra when a spell hits an enemy. You can pick up your things that disappeared from you when you cast the "frozen reality" spell during a dinner party in a chest nearby. At this point, the quest is considered completed.

Your character must be at least level 5 to receive the quest from Namira. Her shrine is located east of Bruma and north of the Imperial City, slightly east of the Silver Road. From Namira's priest Hyolfrody the Hound, you will learn that you are too cute for a follower of Namira, after which further questions will be useless. Under the words "too beautiful" lies the fact that you must by any means reduce your attractiveness (charm) to 20 points or less, only after that Namira will give you a task. A good way to reduce attractiveness is cheap wine, which is sold in many taverns in any city. Namira will tell you that a group of her followers called "Forgotten" are trying to enlighten the priests of Arkay, which, of course, Namira does not want. Therefore, your task is to go to the place where the "Forgotten" live, that is, to the island ruins of Ange, find the priests of Arkay there and cast the "Cover of Namira" spell on them so that the "Forgotten" can deal with these priests. The Ange are located south of Namira's Shrine. When you enter Ange, you can go calmly, you will not meet enemies here. When you see some priest in a green robe, then just cast the spell given to you by Namira on him, and watch the massacre of the priest. There are five priests in total, they walk through the ruins quite separately, so it will not be difficult to complete the task. Return to Namira and receive from her as a reward "Namira's Ring", which helps to repel physical and magical attacks. This completes the quest.

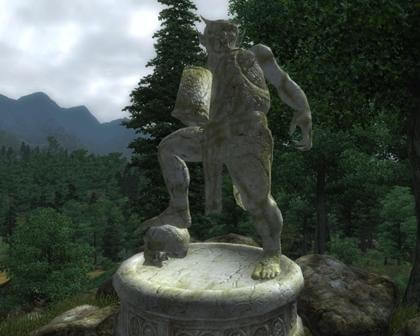
The Shrine of Malacath is located far north of Anvil, close to the border with the province of Hammerfell. To find out what kind of offering Malacath needs, you will have to show remarkable eloquence when talking with the priest of Malacath Shoboba gro-Ragdush, however, if you are an orc by race, then you will not have to persuade him. Offering to Malacath is required quite easily obtained, it's just "troll fat". To complete Malacath's quests, your character must be at least level 10. After you bring an offering to Malacath, he will give you the following task. You need to free the ogres from the captivity of Lord Drad, who uses them as free labor in his mines. Lord Drad's estate is located not far southeast of the shrine. You can complete the task in sequence, that is, go first to the lord's estate, and there, after practicing eloquence again, try to talk with Lord Drad, and then with his wife about the captive ogres, with the end result of recognizing the place where the ogres are kept. But if you use elementary logic, you will easily understand where to look for ogres, especially since Malacath actually told you everything himself. A little to the east of Lord Drad's estate is the "Dismal Cave", and that's where the ogres work under the supervision of overseers. The cave is closed with a padlock, which, however, is not very difficult to open. In the cave at first you will meet a bunch of guards and not a single ogre, but at the far end of the cave you will find a chamber in which the ogres are kept, in another nook and cranny of the cave there is another one of the same, and from these two chambers you will need to release the ogres. Both cells are closed, but the locks on the cells can be broken or even the keys to the cells stolen from the guards. As soon as you release the ogres, a fight will begin between them and the guards, which you can ignore. The main thing for you is to release all the ogres as quickly as possible, because if the guards delay this case, they can kill them individually, and if two groups are released almost together, then the guards will have no chance. In general, as you free the ogres, you can return to the statue of Malacath and ask for a reward. In gratitude for saving the ogres, he will give you a powerful hammer "Volendrang". The hammer is quite heavy, but its lethal characteristics are quite impressive. This completes Malacath's quest.

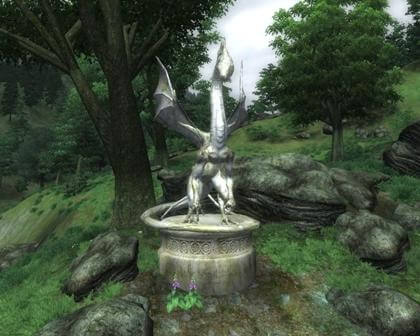
Nocturnal Sanctuary offerings are not required, but your character must be at least level 10 to receive the quest from her. The Sanctuary of Nocturnal is almost on the road that follows the east side of the Niben River from Llavin to the north, about midway between Llavin and Bravil. Nocturnal will tell you that two Argonians from Llavin stole her eye. You accordingly need to find this eye and return it to Nocturnal. Ask the people in Llavin about the "eye of Nocturanal" and they will tell you that they heard two Argonians, Begin and Viban-Na, talking about a large jewel. Go to the house of Wiban-Na, it is located near the inner city small lake, not far from the chapel of Zenithar. Go to the house and talk to Viban-Na, he will certainly deny everything, but do not despair, leave his house and enter again, but in stealth mode. After a while, you will hear him talking to Begin, in which he will say the place where they hid the "eye of Nocturnal". This cave is called "Tidal wave", it is located in the extreme south, on the seashore. There is nothing special in the cave, even the opponents there are the most ordinary animals. The cave, although small, is quite branched, so you may not immediately find the "Eye of Nocturnal". It is under water in one of the branches of the cave, take it and return to Nocturnal. In return, she will give you a simply irreplaceable artifact, the "Eternal Master Key". Just keep in mind, the skill "security" when using this master key, increases much more slowly.

The Sanctuary of Meridia is located west of Skingrad, north of the Golden Road. You need to be at least level 10 to receive the quest from Meridia. You can find out what offering Meridia needs to make in order for her to give you a task from her priest Basal Hernande. He will inform you that a piece of decomposed flesh can serve as an offering. After the appropriate offering, Meridia will give you the next task. You will need to destroy the cult of necromancers in the Howling Cave. This cave is located east of Skingrad and south of the golden path. The first part of the cave is a shaft in which you will not see anything special, but when you come to one of the blockages at the far end of the cave, the stone will move to the side, opening the entrance to the lower tunnels of the Howling Cave in front of you. Before you go there, it’s better to prepare properly, because there you will immediately be met by a crowd of necromancers and a bunch of all the undead, so the battle will not be easy. As soon as you kill all the necromancers, you will be informed that the task has been completed, and you can return to the statue of Meridia for a reward. In gratitude for the elimination of necromancers, Meridia will reward you with a "Khajiit ring" that has pretty good masking properties.
Your character must be at least level 10 to receive a quest from Peryite. It is difficult to determine the gender of this deity, so we will consider him male. His sanctuary is located east of Bravil on the banks of the Silverfish River. When you approach the sanctuary, you will immediately notice (or your attention will be drawn to this) that the flock of Peryite is standing in a circle, but at the same time does not show signs of life. Turn to the statue of the deity, and Peryite will tell you that when his followers tried to summon him, their souls were captured in the plane of Oblivion and are now there, unable to return. Your task is to find their souls in Oblivion and bring them back. Therefore, as soon as you are ready, Peryite will immediately send you there. For those who have not completed the main story quest, the Oblivion plan will be a curiosity, although there will be nothing difficult in the task itself. The place of your landing will be in fact the central point among the surrounding lands. From this place, sleeves will diverge like tentacles, at the end of each of which there will be the soul of a lost follower of Peryite. You can rescue them in any order, although I would suggest starting with some prominent offshoot of the island so you don't get lost and lose count when freeing the followers. The entire territory of the Oblivion plane will be patrolled by fairly numerous Daedra. At the end of each branch, you will meet a spirit with whom it is enough to try to talk to in order to return his soul. After you free all five souls, you will be informed that the gate has opened in the place where you started your journey in Oblivion and, accordingly, will be offered to return to the normal world. Go there and you will see a gate there, glowing blue, which will bring you back. When you return, talk to Perith and get a Spell Break shield from him, which has the effect of reflecting magic quite well. At this point, the task is considered completed.

The Sanctuary of Mephala is located northeast of the Imperial City, across the Red Road, slightly northeast of Roxy's Tavern. Your character must be at least level 15 to complete this quest. Talk to the priest of Mephala Dredena Hlavel and you will learn that Mephala will accept a Nightshade flower from you as an offering, but only from midnight to dawn (approximately 5-6 in the morning). Nightshade can be found in the wild, or bought in a tavern or in an alchemy shop, in general, not so difficult to get. Come to the statue at the specified time, and the goddess will give you the next task. In one of the nearby settlements called "The Path of Sadness" you need to kill the heads of two families, but you need to arrange this murder in such a way that one family suspects the murder of another. The Path of Sadness is located west of the shrine behind the Silver Road. There you can go to the tavern to learn more about these families. You will be told that one of the families belongs to the Nords, and the other to the Dunmer, and the heads of these families jointly manage the entire settlement. The head of the Nord family is named Hrol Ulfgar and is considered an excellent warrior, excellent with an axe. The head of the Dunmer is called Nivan Dalvil, he is a good magician. Go to Hrol Ulfgar's house (although if you want, you can go to Nivan Dalvila's house first, it doesn't matter who you start with) and steal the evidence that will indicate that it was he who committed the murder of Naveen Dalvila. This evidence will be "Ulfgar's ring", which will lie on a table on the second floor, along with blacksmith tools. Therefore, go to the house of Navin Dalvilu and kill him. On his corpse (or rather in the corpse), put the "ring of Ulfgar" to direct suspicion to the head of the Nord family. Then, accordingly, look for evidence that would indicate that Naveen Dalvil killed Ulfgar, this evidence is Dalvil's Ceremonial Dagger lying on a table near Dalvil's bed. Take it and return to Ulfgar's house, kill Ulfgar and put the Dalvila Ceremonial Dagger you got on his corpse (in the corpse itself). After all these machinations, you now need to spread the appropriate rumor that the heads of the families killed each other. That is, just go to the tavern and ask Kirsten, the owner of the tavern, about one of the heads of families, she will immediately pull out a dagger and run into the street, where an aggressive crowd has already gathered. Soon they will start the fight, and you can safely return to the statue of Mephala. Mephala, in gratitude for the completed task, will give you the "Ebony Blade". At this point, the task is considered completed.

Hersin Sanctuary is located south of the Imperial City near the Upper Niben River, slightly west of it. To receive a task from Hersin, you need to be at least level 17, and also present one bear or wolf skin to his statue, his priest Vazhhira will tell you about this. Hersin's task is quite simple, you need to bring him a Unicorn horn. The unicorn lives not far to the southeast of the sanctuary of Hersin in the grove of Harkan. The unicorn is guarded by several minotaurs, it is better to kill them one by one, since even for an experienced player they are quite strong opponents. After you eliminate them, you have the possibility of one ride on the Unicorn (you can ride it only once), so I advise you to immediately rivet screenshots for a long memory or make a special save. It is clear that it will not work peacefully to get his horn, you will have to kill this noble animal, taking the horn from him. Return with the horn to Hersin and in exchange for it you will receive a "Savior's Hide Cuirass" with good protection against magic.
The Sanctuary of Molag Bal is located west of the Imperial City, south of Chorrol, north of Skingrad, next to the shrine to the west are the Serpent Hole and Redguard Valley caves, southeast of the shrine is Wooden Hand Fort ". You must reach level 17 to complete this quest. If you find yourself at the sanctuary by chance, then you will need to talk with the priest of Molag Bal, whose name is Amir. He will tell you that first you need to make an offering to Molag Bal in the form of a Puma (Lion) skin. Molag Bal wants you to lead the true ex-warrior Melus Petilius astray and gives you a weapon to aid you in this endeavor, the Cursed Mace. To begin with, he sends you to Brindle's house so that you reconnoiter the situation. The house is located near the sanctuary to the southwest. You don't have to go into the house itself, just find one of the locals who lives nearby, there are only three of them, and they usually hang out together all the time, just north of Brindle's house. Ask them about Melus Petilius and they will tell you that he is a true righteous man, and also that his wife recently died and he grieves for her very much. Melus Petilius' house is next to Brindle's house, a little further to the southwest. If you watch Melus Petilius, you will notice that every day he goes to the grave of his wife at about 10 o'clock. The following algorithm of actions is far from obvious, but quite logical. You need to take advantage of the moral and psychological state of Melus to do your dirty work. Place the "Cursed Mace" next to the grave and wait for Melus to come to the grave. When he comes to the grave, it's better to save because there may be a glitch. Now you need to hit Melus Petilius with your fist, then he should pick up the "Cursed Mace" left by you from the ground and start beating you. If this does not happen or he starts attacking you with something else, then reboot and try to somehow adjust the location of the mace or try to repeat the operation on the next game day. When he starts hitting you with the "Cursed Mace" do not resist, wait until your death, and you will already be at the sanctuary of Molag Bal safe and sound. Talk to the statue and get a reward from it, it's the Mace of Molag Bal. The mace is enchanted to drain 5 points of strength and 5 points of magic on impact.
To complete her task, your character must be at least level 20. The Sanctuary of Boethiah lies far east of the Imperial City and far southeast of Cheydinhal in the Valus Mountains, east of the River Reed, near the border of Morrowind. Talk to Boethiah's priest, Haekwon, and you'll learn that Boethiah's offering requires a "Daedra Heart". The easiest way to get a Daedra heart is to buy it in an alchemy shop. Return to the statue of Boethiah and give her a gift. She will then invite you to take part in her "Tournament of Ten Bloods", where representatives of the 10 races of Tamriel face off against each other. Having received your consent to participate in the tournament, Boethiah will open a portal to the Oblivion plane, where the tournament will take place. In Oblivion, you will immediately find yourself in a cage, exit from there and go to the large gate to the right. I personally do not know how unified the tournament is, I passed it by Breton, so for him I will describe the sequence of opponents. The first was the Dark Elf, whose weapon was a bow, and in stock he had a fairly large number of all kinds of arrows. The second rival was the High Elf - a magician who fell off the bridge into the lava, so I could not even find out how strong he was, it only turned out that he calls all evil spirits to help him. The third opponent was the Imperial, who also called some evil spirits to help him, but attacked with a weapon and being clad in heavy armor. The fourth was Khajiit in light armor, he did not call anyone to help him, but immediately rushed to the attack. Fifth was Nordling in heavy armor, then Orc in the same configuration. Next is Redguard in light armor. The eighth was the Wood Elf, complete as well as his dark counterpart. The last ninth was the Argonian, who also attacked with a bow. Almost all of the attackers had bottles of life restoration potion with them, so do not hesitate to search the corpses. After killing all nine, you, having described the circle, will return back to the place where you started from, there you will see a portal back to the world of Tamriel. Before sending you will be specifically asked if you would like to linger in order to pick up the belongings of the soldiers you killed. The choice is yours, when you return, go to the statue of Boethiah for a well-deserved reward. For your victory in the tournament, she will present the sword "Golden Brand", which has an impressive defeat by fire. On this task, Boeta is considered completed.
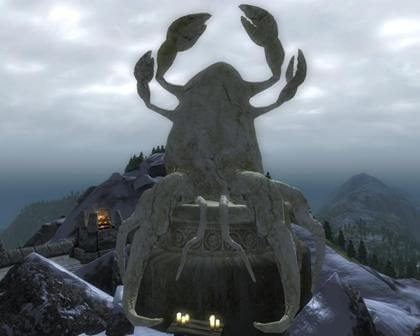
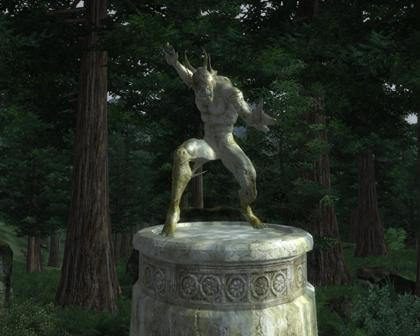
This deity is a bit special and in many ways stands out from the rest. You can only go to Hermous Mora after you complete the tasks of all the other Daedric Lords. In addition, you must be at least level 21 to receive this quest and you must have completed the Blood of the Daedra main quest. storyline . If all these conditions are met, an imperial named Casta Flavus should appear in your dream and inform you that Hermous Mora is calling you. And you accordingly will have to come to his sanctuary. His sanctuary is high in the Jerol Mountains far east of Bruma and about the same distance northwest of Chorrol. The most optimal way to get there is to start from the northern gate of Bruma and immediately turn onto a not very noticeable path leading to the east, the main thing is to be guided so that your path runs approximately to the northeast all the time. If, approximately in the middle of the path, mountain bridges and various stairs begin to come across, then you are on the right road. The sanctuary of Hermous Mor is located almost at the very peak of one of the mountains right on the border with the area, which is no longer passable. The statue of Hermous More is represented as a body with many claws. The task of Hermous Mora will give you a rather peculiar one. He needs you to collect for him ten souls from different races of Tamriel, one from each race. That is Bretons, Imperials, High Elves (Altmer), Dark Elves (Dunmer), Wood Elves (Bosmer), Nordlings, Redguards, Orcs, Argonians and Khajiit. To do this, he will give you a special spell "Mora's Soul Trap" and a special "Hermous Mora's Soul Stone". You can collect the appropriate collection of souls by walking along the roads of the province and various abandoned caves, killing various bandits. The effect of the Morata Soul Trap spell is quite long, 120 seconds. This time is quite enough to cope with a randomly encountered robber or marauder. I will point out one of the places where you can immediately recruit a wide range of souls of various races, this is Fort Homestead. There are a lot of robbers of different races, so at least half of you will complete the plan. It is located south of the Imperial City, just north of the village of "Pell's Gate", familiar to you on the instructions of Clavicus Vile. After all ten souls have been collected by you, a corresponding diary entry will appear, telling you that you can return to Hermous Mora to report on the completed task. For completing this task, he will give you a book called "Ogma Infinium". The main thing is not to rush to read it, first listen to what bonuses the book gives. When you open it, you will be offered to upgrade in one of three directions: "The Path of Steel", "The Path of the Shadow" and "The Path of the Spirit", and if it's a simple set of bonuses for the Warrior, Thief and Mage, respectively. "Path of War" will give you an increase in the attributes of Strength and Speed +10, as well as an increase in the characteristics of Swords, Blunt Weapons and Heavy Armor +10. "Way of the Shadow" will add +10 to your Agility and Speed, as well as +10 in Lockpicking, Light Armor and Stealth. The "Path of the Spirit" for some reason raises only one attribute by +10 - Intelligence (but I think it would not hurt to raise Willpower for equality with other paths) and three characteristics Destruction, Summoning and Recovery +10. There is another positive aspect to all this. Even if some of these skills have already reached 100, then the increase will be +10 to 100, and if one of the characteristics is in your main skills and has also reached 100, then the points that take you to the next level , will still be charged. Therefore, it is best to read this book when all of the stats you want to increase have already reached their limit, and your level growth has also reached the limit. Hermous Mor's quest is the last quest of the Lords of Daedra.

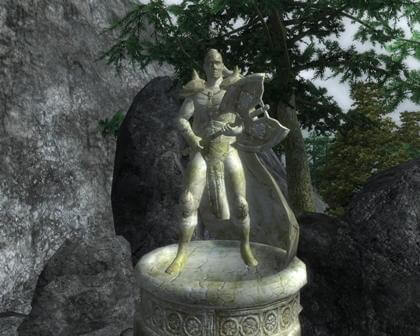
To receive this quest, your character must be at least level 20. The statue of Clavicus Vile is located southwest of the Waterfront, one of the districts of the Imperial City, and south of the Golden Road at its very beginning. To find out about the offering that needs to be presented to Clavicus Vile, talk to his priest Khajiit Ma "Raska. The offering will be the simplest, it is only 500 septims. Immediately pay attention to the statue of Clavicus Vile, it depicts not only God himself, but also a dog. Now , if you have the necessary amount of money with you, you can start communication.Clavicus Vile will make a deal with you, this is how he will interpret your dialogue with him.He needs you to find the legendary "Umbra Sword" for him (hello Morrowind), and in exchange he will give you the "mask of Clavicus Vile" (again, nostalgic for Morrowind).The first orientation that he gives you is the settlement "Pell's Gate", which is located east of the sanctuary and almost strictly south of the Waterfront.As soon as you start on the road , then one surprise will take you by surprise, someone will talk to you.It turns out that this is Clavicus Vile's hound named Barbas (just like Barbos, I'm sorry, I couldn't resist).If you are not too far away from fled, looking back, you will see that Clavicus Vile is now standing alone on the pedestal. Barbas will begin to dissuade you from searching for the sword, because he believes that his owner is making a fatal mistake, without realizing it himself, since this sword only brings misfortune. You yourself understand that it’s impossible to quit the task, because it’s just a game and just curiosity will not allow you not to find out what will happen if you still bring the sword to Clavicus Vile. Therefore, from now on, you’ll forget about all subsequent wiring of the dog (and there will be plenty of them later), and stomp yourself further into the Pell Gate. In the settlement you need to find a man named Irrok the Wide. He will tell you a sad story about his student Lenvin, who changed beyond recognition when this sword fell into her hands. He will also try to warn you against further searches for Umbra, but this, of course, will only give you energy. Yrrok will also say that the last time Lenvin, that is, according to the new Umbra, seemed to be seen in the island ruins of Vindasel, which are located west of the "Pell Gate", that is, in fact, in the middle between the "Pell Gate" and the sanctuary of Clavicus Vile, perhaps you are even on them stumbled along the road. Go to Vindacel to look for Umbra, the ruins themselves are pretty linear so don't get lost. Umbra, according to the "peaceful", of course, will not give you the sword, but will give you time to think, so that you go to hell, otherwise it does not vouch for itself. You obviously won’t think for a long time, take the “Umbra Sword” from the corpse and return back to Clavicus Vile (if the dog Barbas has not yet divorced you to keep the sword for himself). Clavicus Vile will thank you for bringing the "Sword of Umbra" and will give you the promised "mask of Clavicus Vile" in exchange for it. At this point, the task is considered completed. For those who are not too clear about the plot with the persuasion of Barbas, I can offer my own version. It's just that the dog knew about the intentions of his master, which consisted in changing him as a hound to a new one, and accordingly decided to change the course of events. If you still listen to Barbas, then do not expect rewards from him, you will only have to rejoice at a good sword.
Mighty Umbra: Oblivion
"More... demand MORE SOULS!"
Version 1.1
Production A Battlespire Reborn
INTRODUCTION:
The Sword of Umbra is one of the most powerful blades ever forged in Tamriel. Created by an ancient witch executed for bringing a weapon of genuine evil into this world, it exists for one and only one purpose: to kill everyone in its path and absorb souls. Humans and non-humans, kings and beggars, and villains and even daedra bled because of the Umbra, and their souls were consumed by the ever-hungry blade.
A sentient weapon, the Umbra has been passed down from warrior to warrior for centuries, imbuing its owners with great power and slowly but surely destroying their minds. They killed again and again to feed the souls of the evil spirit of the sword. Some have become mad automatons, bringing death and destruction until their bodies fail and their hands drop Umbra; others willingly sought death, disillusioned with the power of the sword and tired of endless killing in the name of an evil spirit. It is said that Umbra's recent master, a large and powerful orc, eventually fled to the wastelands of Morrowind, where the Nerevarine gave him peace. What happened afterwards is unknown, it is said that Azura's chosen did not accept the treacherous blade, and it eventually reappeared in Cyrodiil.
The Sword of Umbra, or rather the spirit within, owes something to Clavicus Vile, and the hypocritical Daedra Prince covets the weapon, most likely because of its ability to hold and absorb souls. For someone who decides to make a deal with Clavicus Vile, it will be safer to comply with the contract - otherwise, he will have to fully reap the storm ... For it will not be easy to use Umbra's energy for himself ..
UMBRAH QUEST START:
1. If you haven't started the Clavicus Vile quest yet, start it at the Shrine of Clavicus Vile and follow the storyline.
2. If you have already killed Lenvin (AKA Current Umbra) and still wield the Sword of Umbra, a new quest will start automatically after you load the game. However, in this case, you will NOT have a chance to get the unique Lenvin armor.
3. If you have already killed Lenwyn (AKA Current Umbra) and the Sword of Umbra is NOT in your possession (but you didn't give it to Clavicus Vile), find the sword and pick it up. The quest will start soon. In this case, you will also NOT have a chance to get the unique Lenvin armor.
4. If you have completed Clavicus Vile's quest and handed over the sword, do not even install this mod: you absolutely DEFINITELY have no way to start a new quest other than using the console. However, if you are using the console I will NOT answer ANY questions related to ANY problems you will encounter as a result of your actions. You have made your choice - live with it. It's an RPG, after all.
KEY FEATURES:
A beautiful unique helmet that you can get along with a sword and some other useful loot.
Unofficial but lore-conforming expansion of Umbra's story.
Five new strong enemies for you, equipped with modified Daedric armor.
A unique chance to test your skill as a swordsman in a battle that will have to be fought without the help of magic.
The BEST and only lore weapon in Oblivion as the ultimate quest prize.
Description: The mod adds the legendary cursed blade "Umbra Sword" to the game, as well as the story of its return. In order to start searching for swords, talk to Farengar in Whiterun and buy the book "Confessions of Umbra" from him, from which you will learn about the difficult fate of the last owner of the sword. But this, of course, is not the main thing, the book contains hints - where or from whom to look.
And in fashion there are two Umbra swords - a copy and an original, they differ both in appearance and in characteristics. You can buy a copy, but the original will either have to be stolen or its owner killed. I’ll note right away that obtaining the sword is directly related to one of the Dark Brotherhood quests, or rather the Glory to Sithis quest.
Upgrade: The Umbra Sword can be upgraded and requires ebony ingots. The blood is also displayed correctly...
In version 1.5. a replayer of the two-handed version of the legendary sword was made, the number of charges for both types of swords was changed, the base damage was changed, 3 volumes of "Confessions of Umbra" were combined into one book, the design was slightly changed.
In version 1.5.1, a bug with enchanting the original sword has been fixed..


Installation: copy the contents of the archive to the Data folder. From the appropriate folders, select esp with one variation of the sword, connect it to SkyrimLauncher. You can connect only 1 version of the sword at the same time: either one-handed (it remained in the kit), or two-handed.


